
I’m building a Slaters kit for a GWR bogie clerestory third to diagram C10. The coach is intended for a motley Edwardian stopping train consisting of a variety of carriage styles, as was common on the GWR in the 1900s. But first it will be used in a re-enactment of the 1911 railway strike, and is therefore in the 1908-1912 all brown livery (as yet un-lined).

This post summarizes the build. It's a long post but I'm told the kits are due back on the market so perhaps this can help give others an impression of what's involved and avoid my mistakes!

What you get. Lots of bits. Wheels weren’t included.

The plastic components are crisp and detailed. I did spend some time cleaning away flash. The larger bits of flash are minimal and not a problem, but there are thin strips of flash along the upper edges of the windows which require care.

I used Limonene (two coats) to bond the sides, which worked well enough. The Magnetic Clamps are from Smart Models.

The partitions were then fitted, followed by the roof. I opened out the notches in the roof for the partitions, so that the roof could be taken on and off during the build.

The seats are quickly made and fit nicely in the compartments - not always the case with kit seats!

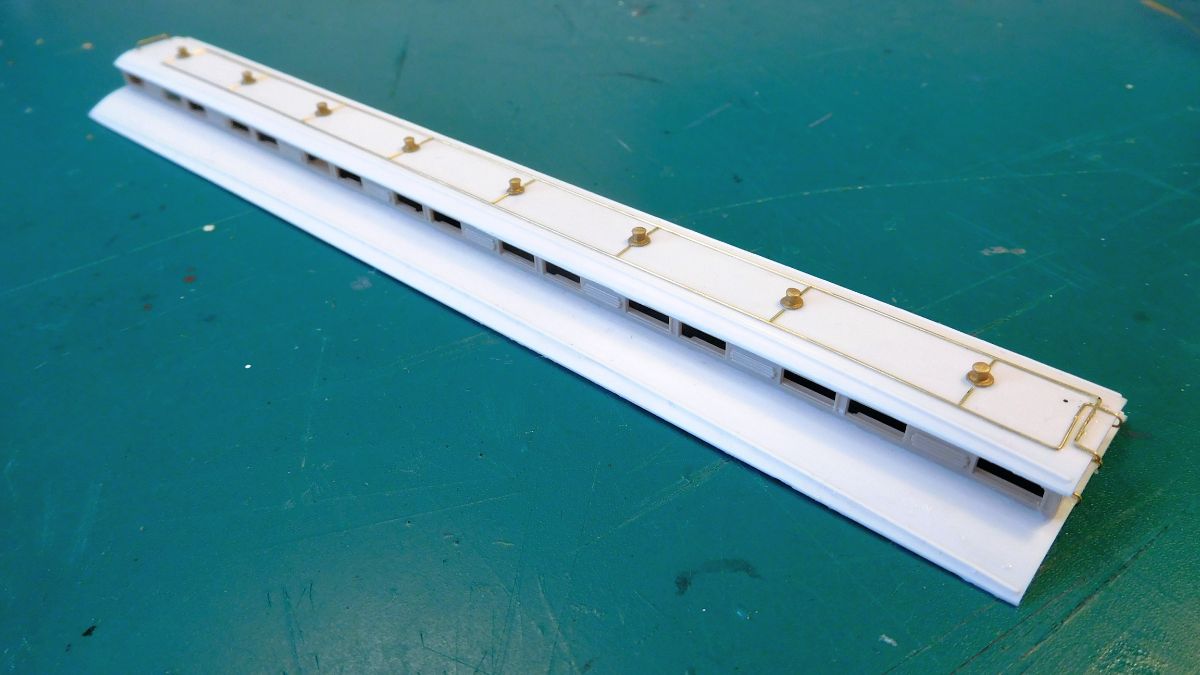
The clerestory structure was quickly built up. The ends and clerestory parts are “handed” with different details at each end.

The underframe, solebars and headstocks were then fitted. Etched brass snuck in via the "racking plate", which was glued in place.

I then turned to the bogies.

They fold up nicely.

One mistake was to put off strengthening the stepboard supports with solder. They are very fragile and will soon break off otherwise. The photo shows the ones I managed to rescue, the rest were replaced with wire later on.

The inside frame and rocking mechanism was then made.

The principle of the kits - at least those produced until now - is that the wheels run in the inside frame using "inside bearings". Brass wire hold the wheels in place and allow sprung movement. This design has drawn critical comments from people who struggled to get good running. I understand that it will be changed when the kits are re-released.

In any case, I lacked the correct axles so decided to go for an alternative approach, using Alan Gibson pinpoint axles in ordinary bearings. Thanks to "Darwinian" on RMweb for the idea.

For this approach to work, the pinpoint bearings must fit perfectly into the recessed aperture around the hole in the bogie sides - seen here - and must be of the right depth. Otherwise the sides will splay.

Using the right bearings was therefore critical. I tried various types including 2mm Top Hat bearings but these would not accommodate the axles within the bogie frames. Eventually I used these waisted bearings plundered from old Coopercraft kits, as seen above.

The ends of the bearings did need some filing so that the axleboxes would fit over them. Filing the inside of the axleboxes also helped.

With this simplified approach the inner frame was not strictly required, but I decided to fit it anyway to add strength and hold the rocking mechanism.

Just checking that you're still awake.

The bogie interiors were gradually becoming inaccessible so I primed them and painted the Mansell wheels. The latter are brownish red as a loose indication of varnished redwood (see good discussion on Western Thunder).

A silly mistake cost me dearly. I forgot to fit brake shoes until the wheels were firmly in place. Retrofitting the 16 shoes was a hellish task. As a result the various brake pull yokes didn’t fit properly, so much of that is just indicated with brass wire.

Once back on track, the cross stays and scroll irons were fitted. There are useful close-ups and drawings of Dean bogies in Russell's GWR Coaches Part 1 p. 93-95.

The scroll irons were then cut to allow the bogie to rotate. Not exactly neat cuts, they were filed later. I do need a proper flush cutter.

In order for the bogies to rotate, the frames have to be modified at each end.

I hope I got the position of the gas cylinders right. I peered into the murky darkness of prototype photos and Didcot's C10, which suggests it's more or less OK.

Next the underframe details were fitted.

I shortened the queen posts, as I felt the truss rods ended up too low if fitted as intended. Prototype photos like this one (and the C10 at Didcot) shows them higher up and fairly discrete. Unless truss rods changed over the years?

I didn't fancy "trapping" the bogies with the brake pull rods, so just fitted this single rod held by (unprototypical) vertical mounts. The bogie can be slid out underneath it. Bit of a bodge but at least something is there for those rare glimpses.

The main buffer components. There’s an option of springing them, though I didn’t use it. The instructions state that the buffers "consisted of a curved oval steel plate bolted onto a round buffer head".

The outer plate needs to be lightly curved and then fitted to the buffer heads. I didn't make a good job of this, it looks a bit odd. If I do another one I'll see if ready-made buffers can be obtained instead.

Next the stepboard hangers went on. This required patience as the hangers, solebars and stepboards all need modification for the parts to fit, as also indicated in the instructions.

The material used for the stepboards somehow managed to be both bendy and brittle at the time, though note that this is a secondhand kit of some age. My adjustable multi-purpose jig a.k.a. “The Piano” saved the day.

The lower stepboards were then fitted. I later found that the bogie stepboards had to be shortened approx. 1,5 mm to clear the central stepboard. The hangers for the latter also need modification or they will stick out oddly.

It’s striking what a difference stepboards make to the appearance of a coach.
From there on it was plain sailing. The roof was detailed using the as lamp tops in the kit, and 0.3mm (0.010") brass wire.

Steps fitted at one end, and putty to fill out the corner joins. In 1911 the GWR experimented with Bluetack on buffers in response to complaints about rough riding. The idea was abandoned when a Slip coach destined for Weymouth was found still attached at Penzance.
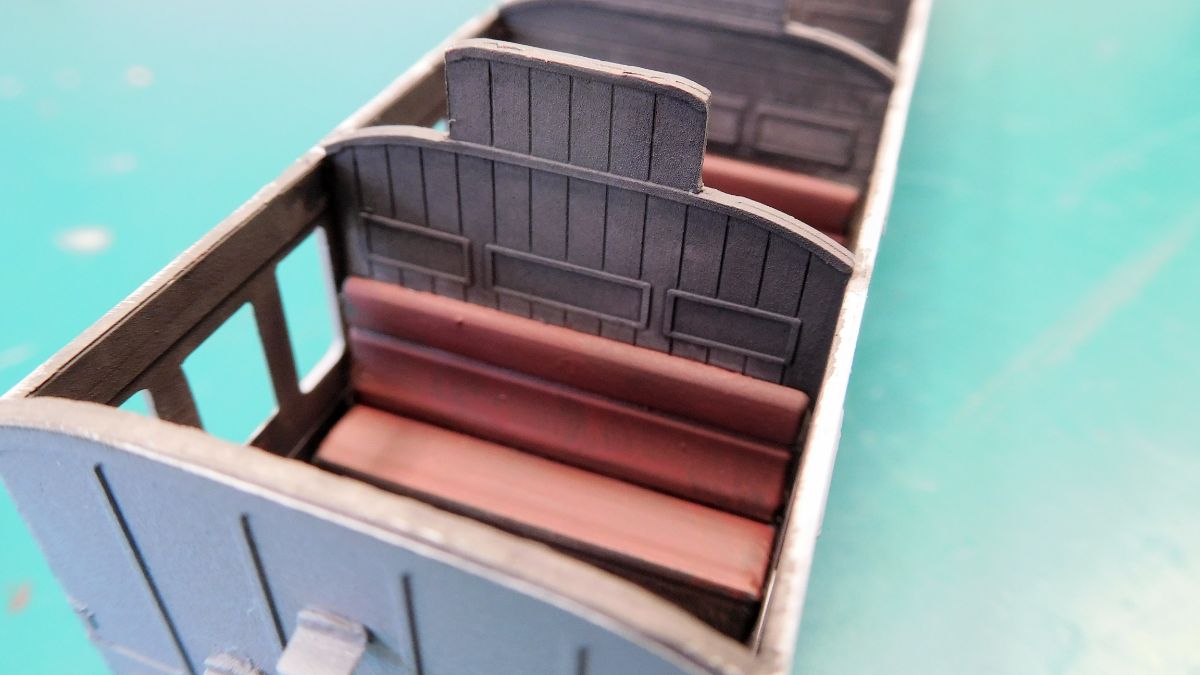
After priming, the interior was painted. I decided to leave the 48 picture frames untouched.

The coach sides were brush-painted with my normal method of multiple coats (5 in this case) of much thinned Vallejo acrylics, using a broad flat brush. In the photo a fresh coat is being applied.

The coach was painted all-brown as per the 1908-1912 livery. The photos I have show light to dark grey rooves (probably the usual darkening) with no brown beneath the rainstrips.

Commode- and door handles were then added, followed by lettering and insignia. The 1908 livery had the garter in the center, and crests either side with "GWR" above. The position of the crests at the outer ends makes for an unbalanced look and takes some getting used to.

But that's how it appears in this crop of a 1911 photo of a scene I'll be modelling. Perhaps this extreme position of the crests was in fact a particular feature of the little explored 1908-1912 livery - brakes excepted? Photos of bogie coaches in the all brown livery are rare, but there is a Toplight in Russell 's GWR coaches which also has the crests just before the last passenger door at each end. The photo in Slinn's Great Western Way has the crests further in, but on inspection that coach has guard doors at each end, and so there would not have been room to put the crests further out on that particular coach (crests were kept clear of doors). Of course in 1912 the GWR did move the crests further in, with just a single "GWR" placed above the garter.

The 1908 livery saw the introduction of black ends. The hand rails are 0.3 mm wire from Wizard Models, which I found easier to shape than the wire in the kit. Vaccuum pipes and couplings to follow.

So far I have never lined my Edwardian coaches, a pragmatic decision in order to get things built and running. In this case it does add to the austere appearance though. Perhaps it's time to try out an Easi-Liner pen.
Anyway, that's the current state of play. My original plan was to use this livery for a photo shoot of selected 1911 scenes and then repaint it in pre-1906 livery with cream panels. However I must admit that the sombre look is growing on me. Something to ponder.