Here’s an update on Farthing’s main station building, modelled on the 1910 prototype at Newbury (see this post for details).
This post summarizes work on the station's walls and gables, as seen here shortly after the prototype was constructed in 1910.
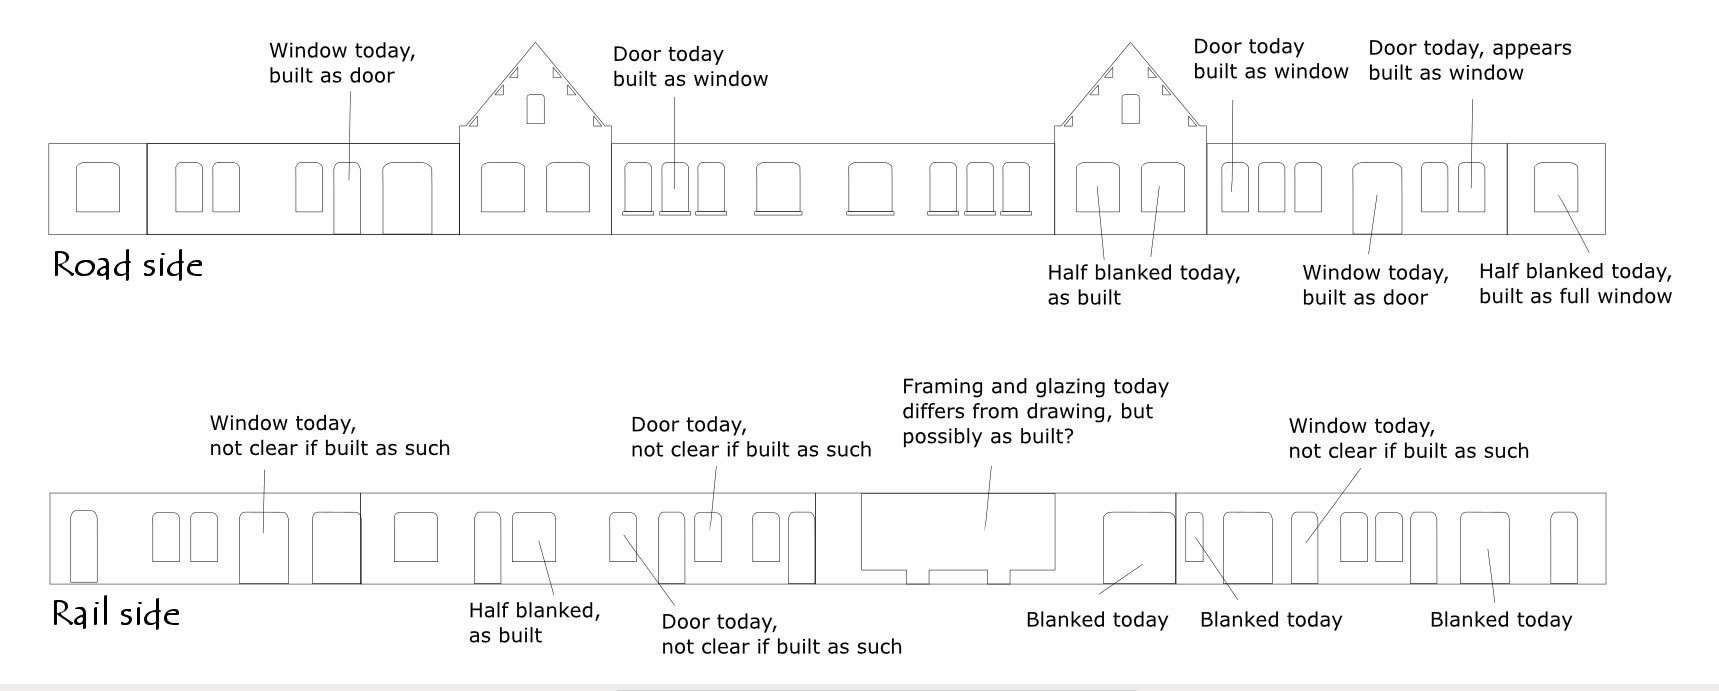
Although the structure at Newbury is still with us there have been numerous detail changes over the years. Above is a selection of those I have spotted. Most changes appear to have been made after the station was built, so I’m going with the original GWR drawing.
The GWR drawing was imported and re-drawn in Inkscape, allowing me to cut the brick sheets in my Silhouette cutting machine.
The Silhouette can’t cut styrene deeper than 10 thou, so it essentially scribes the outline on the back of the brick sheet (not the front, too bumpy) and I then cut through with a scalpel.
The brick sheets are SEF. They aren’t ideal for the Newbury brickwork, I had planned to use Slater’s, but the first batch of Slater’s crumbled in my hands and the next batch didn’t cut well in the Silhouette.
The outer “skin” for the sides were then ready.
A first inner layer was added, using 1mm Foamex from Green Stuff World. The Silhouette cuts this well but again only partly through, so more scalpel work followed.
The first layer of Foamex fitted behind the brick skin. I gave up replicating the prototype’s bullnose bricks and subtle profile around the window edges. I did try, using good advice from other modellers, but couldn’t achieve a convincing look.
Instead, the brick edges around the windows were simply indicated by indenting the foam with a suitable tool from a scribing set. It’s the biggest compromise on the model but I can live with it.
The basic sides and ends, a DIY kit of sorts.
I then set about adding the Bath stone embellishments. Here, different types of styrene rod have been joined to represent the profile of the lintel bands.
The lintels were cut on my Silhouette, with decorative parts fashioned from triangular rod and small “V’s” cut from Evergreen sheet. 3D prints would have been more accurate, but I enjoy piecing things together on my own – despite the compromises.
The prototype stone sills had an overhanging lip, replicated with laminated strips of styrene. Try not to get too excited by these riveting photos :-)
The parts were sprayed with Plasti-kote primer, and later painted Dark Sand (Vallejo 70.847).
The walls were painted using a new approach I hadn’t tried before. Will post separately on that.
Next the roof bands were stuck on.
Then the lintel- and sill bands were fitted (or is it “string courses”, my vocabulary fails me here).
The plinth, with the blue bricks that were such a distinctive feature on 20th century GWR structures.
And finally the lintels were stuck in place. I cheated as they should be flush with the brickwork, but that would have entailed some very tricky cutting of the SEF sheets which I think wouldn't have looked neat. The vertical ornaments help conceal the dodge.
I then set about decorating the gables. Won’t take long, I thought.
But there followed much faffing about with bits of styrene, combining various shapes to compose the ornamentation.
The faux gables including raised brick courses above the lintels, and the ornamentation coming together.
The decorative “pinnacles” (what's the word?) were tricky, being hexagonal yet slim. I first fitted strips of brick sheet on a hexagonal Plastruct rod, but the thickness of the SEF sheets made them overscale.
So instead I just scribed the hex rod directly to indicate mortar courses, as seen here. Far from perfect, but it blends in OK. Decorative balls were made from pinheads, stolen at night from my wife’s sewing table. She knows, but pretends not to.
There were two gables, so it took a while. If deconstructed each gable would consist of 101 separate bits. Probably not unusual for a scratchbuild, it’s just that normally we don’t count!

An overview of all the brick sides. My camera exaggerates the colours. A few final details (downpipes etc) will be added later.

The Bath stone was looking a bit plain (bottom), so was lightly weathered (top), though the camera doesn't show it well. I want the structure to look new, i.e. within a few years of construction. [Note to self: Vallejo Pigments Natural Sienna 73.105 + MIG Panzer Grey Fading P035].
At 83 cms this is the longest structure I have built. After years of happily snapping small layouts, I’m struggling with the photographic challenges of such a long structure.
First passengers have arrived! I had planned to divide the structure into 2-3 separate sections for easy storage but am now thinking it’s easier to just build it as one whole unit.
A dry run with all sides in place. The windows are almost ready to fit, and parts are being cut for the interior carcass. More on that later.


